
We may receive a commission when you make a purchase from one of our links to sites such as eBay and others. As an Amazon Associate we earn from qualifying purchases. Thank you for support!
If you are new to the fun + fabulous world of appliqué, this guide will cover everything you could ever need to know to get started! Appliqué is very easy to learn and gives you all kinds of new opportunities to create all kinds of designs in you quilting + embroidery projects.
What is Appliqué?
Appliqué, which comes from the word application, is the laying of one kind of material over another. In the context of quilting and embroidery, this usually means one piece of fabric cut into a shape is then applied or placed on top of your foundation fabric or background.
If you are used to creating various patchwork designs and patterns in mostly blocks and triangles, appliqué opens up a whole new world of shapes for you – you can easily add circles or even cut out pieces to create different designs – or even animals or objects for a themed project.
There are tons of beautiful appliqué quilt patterns, but there’s no reason to stop here – you can use appliqué in embroidery projects, or even attach various appliqué designs to your existing clothes, bags, and more!
Appliqué can seem a little intimidating at first, but this guide will walk you through everything you need to know to get started!
Materials Needed for Appliqué
You don’t need a lot to get started with appliqué, but here’s a run down of the basic supplies you will need – I’ll go into each of these in more detail in this section:
- Fabric
- Thread
- Scissors
- Washable Glue (optional)
- Interfacing or Stabilizer (optional)
Let’s look at each of these materials in a little more detail.
What Kind of Fabric to Use for Appliqué?
There are no hard and fast rules for what kinds of fabric to use for Appliqué, but one thing to consider is how well two different fabrics play together and whether they need cared for differently.
For example, if you have cotton fabric, and you plan to appliqué on top of it, you will want to use cotton for your appliqué piece most likely, as it won’t need cared for differently – you can usually wash both the same way.
Silk and velvet often work well together for appliqué, since they both require similar care when washing and cleaning.
There are also a lot of precut + premade options for appliqué projects – whether they are pieces already cut out + ready to stitch on or patches.
Tons of Options for Thread!
In addition to your fabrics, you will also need some type of thread to attach your appliqué shapes to the underlaying fabric. You can certainly easily stitch your pieces on with regular thread, but you may also want to consider using embroidery thread with different stitch designs or even attaching cording or lace around the shapes to add some dimension to your project.
Scissors + Cutting Tools
In addition to fabric and thread, you will also need a way to cut your pieces out. You can often use templates which you trace as a pattern to cut out various shapes and designs with scissors, but another fun thing to explore is using a cutting machine.
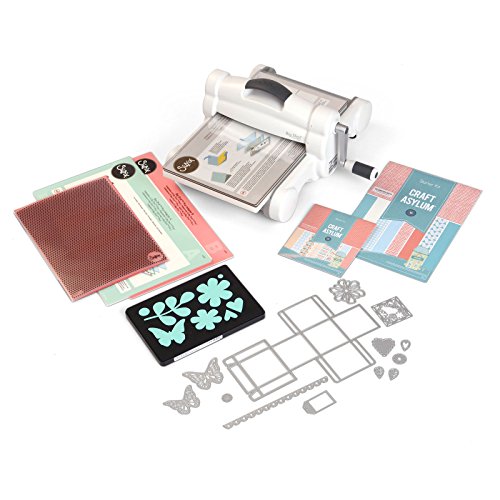
There are a lot of different types of cutting machines, which we write about in our guide to cutting machines for fabric, but my top choice is a Sizzix Big Shot Plus, simply because it is so easy to use – there is really no fiddling around with anything and so many different die shapes are available!
A good pair of fabric scissors with a serrated blade can also be a great option for cutting out more intricate shapes – I love my Wonderful Scissors by Emma Oliver – they truly ARE wonderful and I have all three sizes!


Optional Supplies: Glue, Interfacing, and Stabilizers
There are many different ways to keep your two pieces together in place before sewing and stitching them on.
I like to use a regular ole washable glue stick the most often, simply because it requires little time or fuss. Other times I will baste my stitches on using the invisible stitch method. Basting this way helps anchor your piece in place a little better and more permanently than glue.
Many, many quilters I know LOVE their fusible interfacing, so that’s also another option to explore. With fusible interfacing, you simply iron one side of it onto the piece of fabric you want to cut out, and then iron that piece onto your underlaying fabric.
If you’re not using fusible interfacing, another thing you may sometimes want or need when doing appliqué projects is some type of stabilizer because it can help give the piece some strength for stitching. You can opt for cut-away stabilizer for projects where you won’t see the back of or stretchy fabrics, or you can use a tear-away or washable stabilizer if it’s a better choice. Our guide on embroidery stabilizers will help you understand this a bit more!
How to Appliqué Step by Step
While the process of appliqué is pretty straightforward, I know I often need step by step directions for things that might seem obvious to everyone else, so I am sharing this step-by-step here just in case you’re like me. 🙂
1. Prepare Your Fabric
In most cases, you will be appliquéing on top of another piece of fabric. This could be a quilt block, a jacket, or even a piece of fabric you’ve put into an embroidery hoop to sew into another project later.
You don’t really need to do a lot to prepare what you will be appliquíng on, unless of course you are adding some type of stabilizer to it. The most important thing is that your fabric is freshly ironed and free from wrinkles – those will cause you issue later if you don’t get rid of them now!
If you are using fusible interfacing, now is a good time to also add it to the fabric you are using for your appliqué design. You already have your iron on!
2. Cut Out Your Shapes
Before cutting out your shapes, one of the things you will probably want to think about is whether or not you want to have raw edges of the fabric on the outside of your project.
If you plan on folding your edges over so there are no raw edges, this is called turned appliqué, and is a good choice for projects that will be washed and worn frequently, as it will minimize fraying.
Of course, sometimes that fraying is a desired effect, and other times the fraying isn’t really an issue because of whatever you plan on sewing on top of it – so don’t feel like you have to do turned appliqué!
If you DO want to turn over your edges before tacking items down, make sure you give yourself enough of a seam allowance to do this when cutting. Usually anywhere from 1/4″ – 1/2″ inch is more than sufficient!
There’s tons of different ways to cut out shapes as we talked about earlier – you can trace a pattern you print out onto a piece of fabric or you can of course opt to cut out your shapes with a cutting machine.
If you applied fusible interfacing to your fabric, cutting it out will be a lot easier than if you haven’t, but again, it’s a matter of personal preference and you don’t really need it unless you love working with it. If you have a good pair of scissors like the Wonderful scissors by Emma Oliver I was talking about, you can cut out all kinds of shapes even when your fabric isn’t stabilized no problem.
Not sure what type of shape or design to use? We have TONS of awesome appliqué designs you can choose from!
3. Baste Your Shapes Onto Your Foundation Fabric
With your shapes cut out, and your foundation piece all ironed nicely, the next step is to baste the shapes in place so you can easily stitch them on or embroider around them.
If you are doing turned appliqué, this is the time when you’ll want to turn over the edges of your piece so the raw edges will be hidden. You can do this with either a glue stick or some basting stitches. Having your iron handy can also help make it easier to keep the fabric folded into its place.
As I said earlier, I often just use a washable glue stick to baste my cut-out shape onto my fabric, but it depends on the project. If I don’t use a glue stick, I typically will use small, invisible basting stitches to tack it into place.
If you are using fusible interfacing, this part is very easy – simply place it where you want to attach it and iron it on!
4. Almost Done: Stitching it On
The last step of course is to stitch your appliqué piece on. There are many, many different ways of doing this, and you can do it by hand or in some cases even by machine.
If doing it by machine, you will likely want to just top stitch about 1/8″ away from the edge of the shape. Top stitching by machine is great for geometric shapes or shapes that aren’t too intricate. You could also opt for a zig zag stitch around the edges or even a more decorative stitch on your machine if it’s available to you. If your design is a little more detailed however, you may want to sew by hand.
If sewing by hand, the blanket stitch is a popular choice around the edge of different designs and it often gives it a bit of a decorative look to it as well. You can also do a straight stitch or if the mood strikes you, you can always do a wide variety of other more decorative embroidery stitches, such as the chevron stitch, fly stitch and more.
Many people have had a LOT of fun doing appliqué “in the hoop” on their embroidery machines as well, although this will usually require doing some testing or working with a specific pattern so the shapes of your fabric and the digitized design line up.
5. Lace, Cording, Ribbons, Trim + Other Fun Embellishments to “Fancy It Up”
Something I like to do a lot with various appliqué projects is to “fancy it up” a bit by using lace, cording, trims or even buttons and charms.
Cording and trims can easily be added on with a simple couching technique when you stitch around it along the edge (usually done by hand) – you can also attach lace or ribbon around your project.
Buttons are great if you are doing any kind of animal designs – they make for super cute eyes!
This step is COMPLETELY optional, but it is a lot of fun to do, especially if you enjoy projects like Crazy Quilting or Slow Stitching!
Appliqué can seem daunting at first, but like most of the projects we share here, once you get a hang of the basics it’s easy to get hooked and it really does open up a TON of possibilities!
While the basic technique we’ve shared here is geared mostly for quilting or embellishing other fabric projects, the sky is the limit on other ways you might use it in textile and fiber arts. You can do wool felting appliqué or even do it with crocheted or knitted pieces – and it’s a ton of fun!
Do you have any questions about getting started with appliqué? Any tips for beginners we might have missed? We always love to hear from our readers in the comments section below!