
We may receive a commission when you make a purchase from one of our links to sites such as eBay and others. As an Amazon Associate we earn from qualifying purchases. Thank you for support!
Today I have a vintage desk makeover to share that only took me about an hour from start to finish. I called Ray at 1:18 this afternoon to ask where he was hiding his orbital sander and by 2:30 the desk was already back in the house.
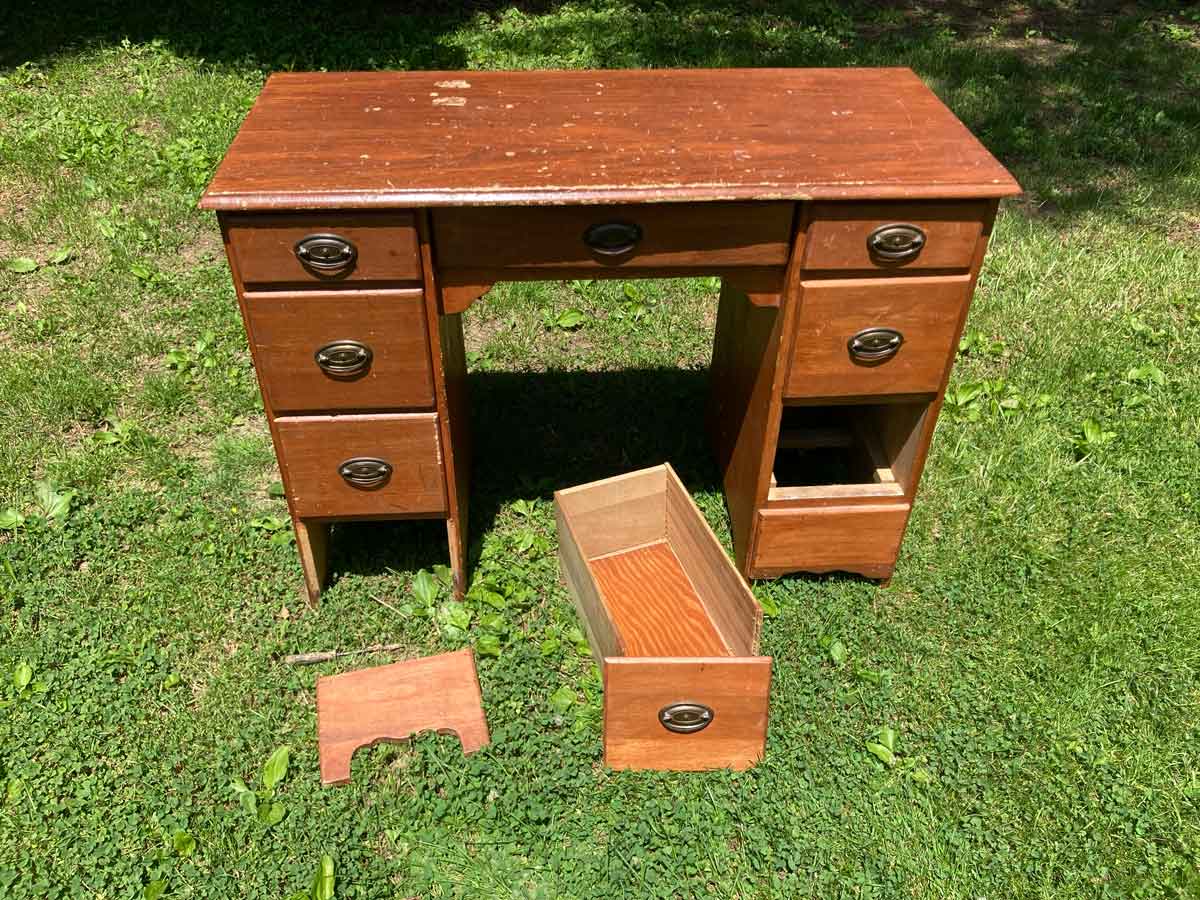
For the past 10 years, my desk has been in my daughter’s room. Naturally, as any kid’s furniture is expected to be, it was pretty beat up. The one drawer was broken, the hardware was loose, and somehow the kids had actually even broken off the front decorative facing on one side.
Here’s what my poor desk looked like after I dragged her outside:
Resalvaged is a good word for this desk, because it’s actually the second time I’ve revamped it. We first got the desk sometime in the 1990’s – my mom’s friend was getting rid of it because her daughter was going off to college and no longer needed it, so to our house it came.
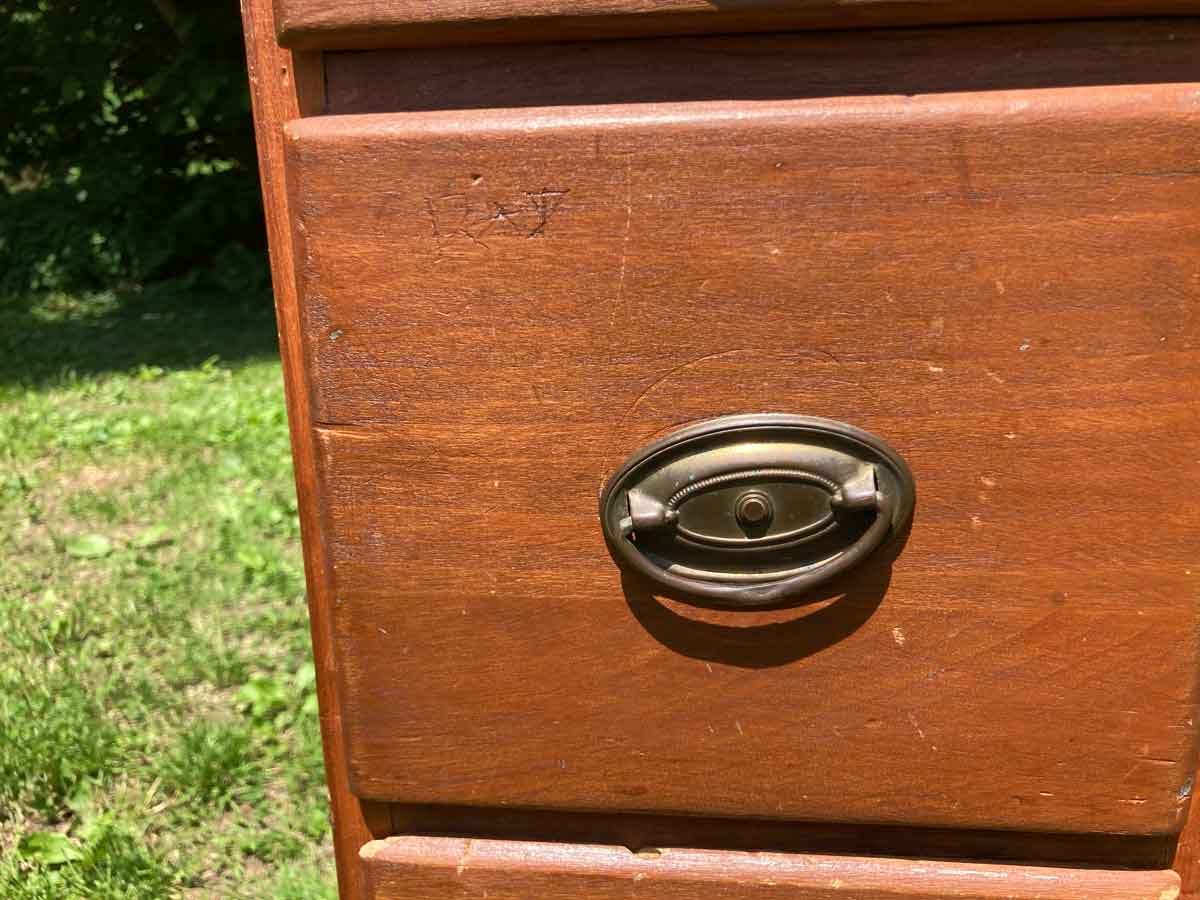
The desk was a minty teal green when we got it and had LOTS of words and names carved into it when we got it. My mom didn’t like that too much (especially probably not the swear words!) so she sanded off the paint and then stained it a Minwax colonial maple color..
Some of the original “minty green” paint could still be spotted on the desk if you knew where to look – along with some of the initials that were carved out on the drawers that my mom must have not seen.
This desk and I have been through a LOT over the past 30-something years. She’s a good desk who has seen me through everything in my life, and so it was time to give her some much needed TLC.
The first thing I did, was drag her into the shade. It wasn’t terribly hot today, but it was sunny.
After that, the next order of business was to repair the broken drawer. This was easy enough to fix with some wood glue. Then I put the front face back on it – that was just a matter of nailing it back in.
Next came sanding the desk, which was a quick process with the help of Ray’s cordless orbital sander. It’s a Ryobi sander and that thing is awesome. I didn’t really worry about sanding all of it off, because I knew I wanted to “shabby it up” and wanted some of the old stain to still come through.
Here’s what it looked like after sanding and ready to paint:

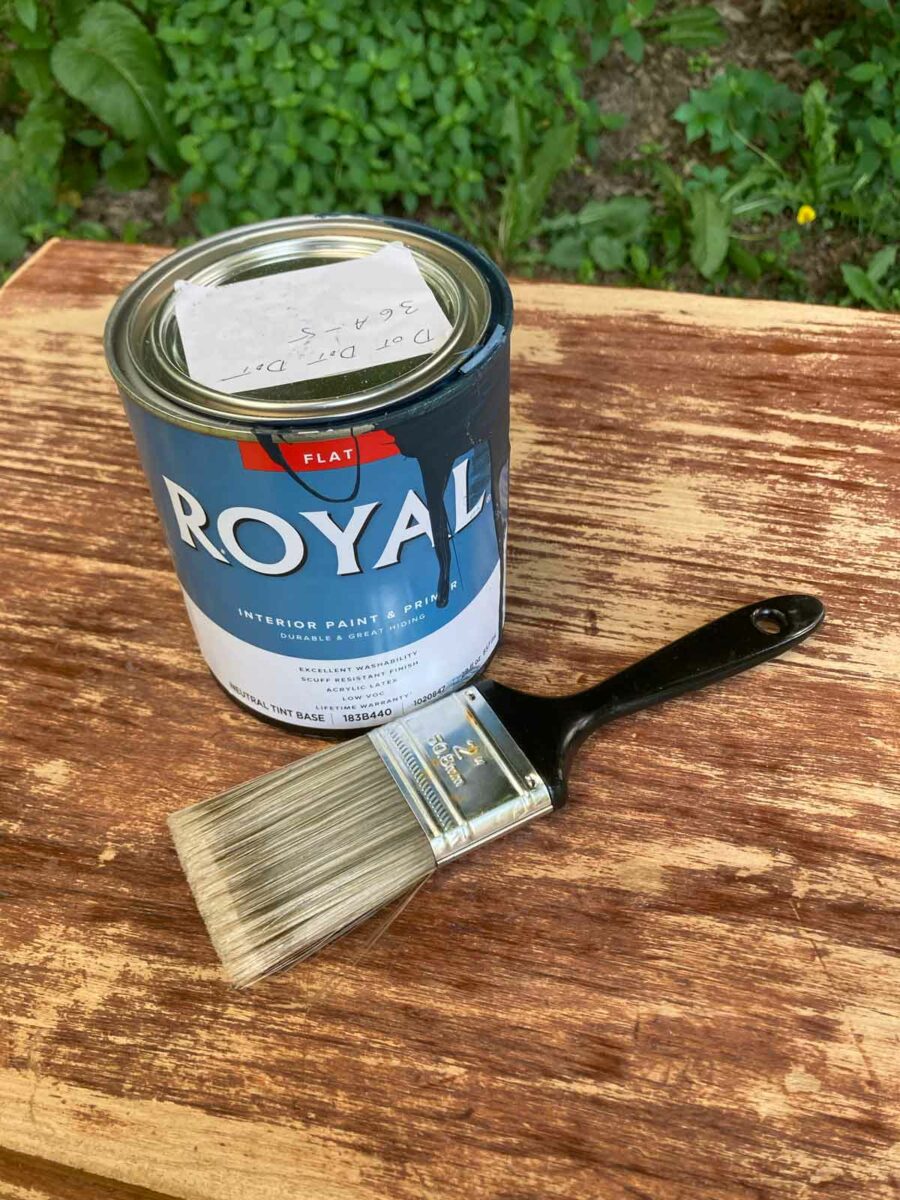
I had some leftover dark blue paint from another project, so I used that to paint the desk. The color is “Dot Dot Dot” from Ace Hardware, it doesn’t look blue on my computer screen at all, but it definitely has a blueish hue to it on the paint chip sample.
You can really see what the desk looked like after I sanded it in the photo above. Painting was pretty easy – I just dry-brushed on a thin coat of the paint.
Since it was pretty warm today and I did a very light coat, the paint was dry within 10-20 minutes. The longest part of the project was actually waiting for the wood glue I used on the broken drawer to dry.
I think the desk turned out pretty nice:
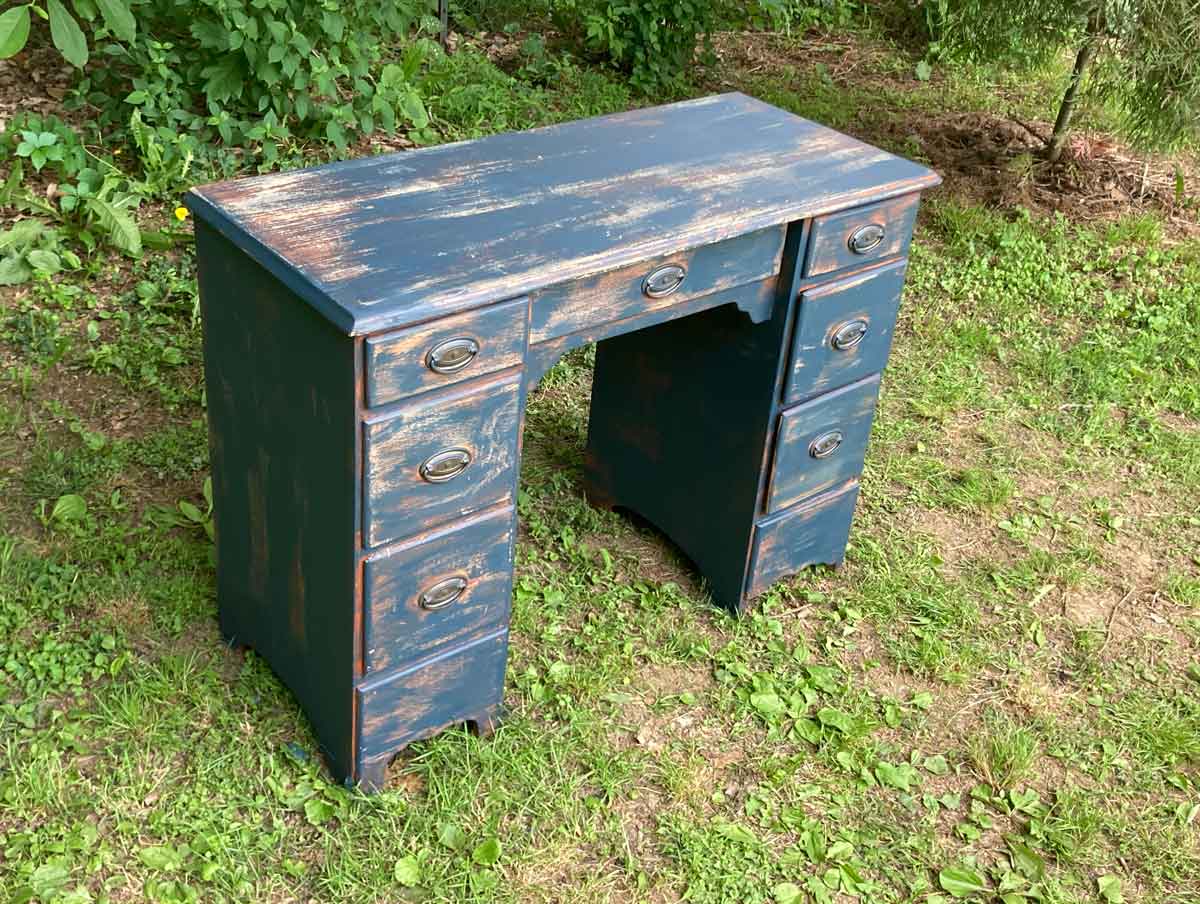
I’m sure not everyone would love this style – and I think it’d look even better if I went over it with a black walnut wood stain – but for now, I’m very happy with the desk. At least she’s all back together and R+J’s initials are finally gone.
It’s been awhile since I’ve revamped any furniture and i forgot just how much fun it is. It’s nice when stuff comes together quickly like this – I might just have to paint something else soon!