We may receive a commission when you make a purchase from one of our links to sites such as eBay and others. As an Amazon Associate we earn from qualifying purchases. Thank you for support!
We have shared a lot of decoupage projects here on our website, so today I thought I would share some tips on how to decoupage. If you have never decoupaged before, this will help you get started in learning everything you need to know on how to decoupage plus important info about supplies and techniques.
I first started to learn how to decoupage when I was still in high school – nearly 24 years ago! This was before the days of internet, and I didn’t know it was called decoupage of course, but I always enjoyed taking old images from books and magazines and gluing them to different items.
What is Decoupage?
If you are unfamiliar with decoupage, it is the process of cutting out images and gluing them to pretty much any surface you can think of, and then coating with a varnish. Some people call decoupage “painting with paper”, because the images you glue onto the item truly can look like they were painted!
Fun fact: the word decoupage comes from the French word découpert, which translates literally “to cut out”.
The process for decoupaging an item is relatively simple: Take an image, glue it to an object, and then seal it. It really is that simple! Of course, there are a lot of tips and tricks to making sure your projects turn out nicely, and so that is what we will be covering in the article.
Warning: Learning How to Decoupage is Addictive!
Decoupage is one of my favorite things to do, and I have to warn you right now as a beginner in decoupage, it’s important to know this activity is so much fun it quickly becomes addictive.
You might start visualizing every item in your home with decoupage. You might never be able to look at images in a book or magazine the same way again. You might spend hours searching online for vintage images for decoupage projects.
My first decoupage project as a teenager was a lampshade I made by decoupaging different flower images cut out of a Better Homes & Gardens magazine. My next project was to alter a Valentine’s Day heart-shaped cardboard candy box.
Before I knew it, I sort of decoupaged my entire bedroom – yes, including the walls! To appease my mother who was worried about the walls, I decoupaged my collage cut-out pictures onto posterboard that I hung on the walls and not the walls directly themselves!
Needless to say, I very much enjoy decoupage to alter different items. It’s a very fun & creative process, and while everyone has different styles and preferences for what they like, decoupage can be quite fun for everyone to try.
If you want to learn how to decoupage, my hope is that this simple guide will help you get started!
What Types of Items Can I Decoupage?
You can pretty much decoupage anything as long as you use the right type of glue for the surface you wish to decoupage! From wood to metal to even glass, you can decoupage all sorts of items!
Here’s a couple of the things that are very fun to decoupage:
- Furniture: Tables, chairs, desks, dressers and more!
- Kitchen Items: Serving Trays, Dishes and Bowls
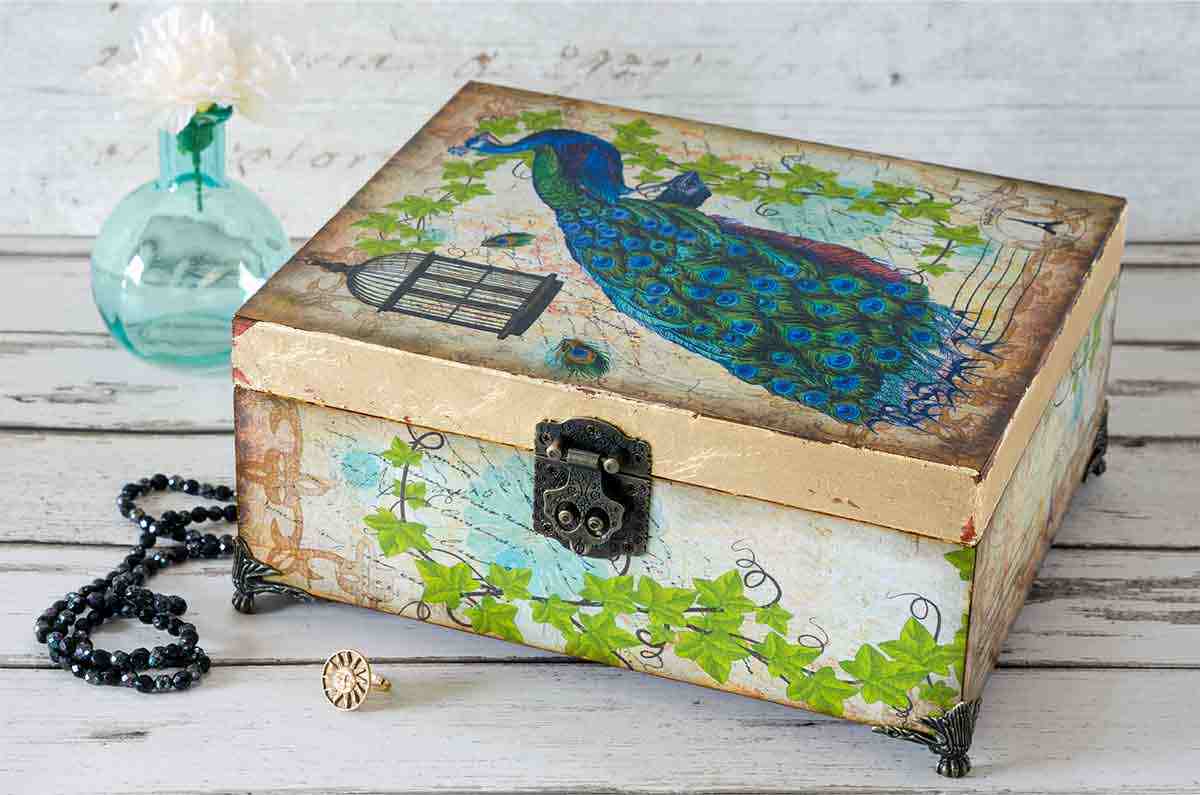
- Containers: Boxes of All Shapes and Sizes
- Jewelry Boxes: I LOVE jewelry boxes and trinket containers!
- Wine Bottles: See How to Decoupage Bottles
- Lamps & Lampshades
- Photo Frames
- Birdhouses
The possibilities are endless! If you can attach something with glue to the object, it is totally a good candidate for decoupage! While wood is very popular because it takes to different types of glues very easily, you can decoupage glass, metal, and even plastic with the right adhesives!
Where Can You Find Images to Use for Decoupage?
Just like there are unlimited possibilities for what you can decoupage, there are also a LOT of different types of things you can use to cut out as images for decoupage!
Here is a list of some popular things I like to use for decoupage projects:
- Images and Text cut out from old books and magazines
- Paper Napkins
- Wrapping Paper & Gift Bags
- Scrapbook Paper
- Greeting Cards
- Fabric Scraps
- Catalogues and old mail
- Clipart Books
- Vintage Printables
This should give you plenty of items to use as decoupage images for your projects! See my post on where to find decoupage papers for more ideas!
Understanding the Different Types of Glues, Adhesives and Varnishes Used for Decoupage
If there was ever a topic up for debate, it would have to be “what is the best glue for decoupage?”
There are so many different opinions out there on this, and so usually it comes down to the individual person’s preferences and experience level. There really are only 3 types of adhesives that are used, so we’ll cover each of these here!
Here are the most popular adhesives for decoupage:
Aleene’s Collage Pauge:

Aleene's Duncan 8-Ounce Medium Collage Pauge Instant Decoupage, Matte
This is a product specifically designed to be used as an all-in-one glue and sealant when decoupaging.
I have always been a fan of Aleene’s glues for a multitude of craft projects, and of course this one is no exception!
It is available in a matte finish, which has a flatter appearance, and also a glossy finish. If you want your items to be glossy and shiny, go for the glossy version.
ModPodge:

Mod Podge CS11303 Waterbase Sealer, Glue and Finish, 32 oz, Matte & Gloss Waterbase Sealer, Glue (16-Ounce), CS11202 Finish, 16 oz
What would a post about decoupage be without mentioning ModPodge?
This is another all-in-one glue and sealant for decoupage. Again, you can find it in both matte and glossy versions. If you can’t decide between matte or glossy, you can even buy this pack that includes both!
They also have several adhesives specifically formulated for different types of projects, such as fabric ModPodge for tissue paper or fabric or even dishwasher safe ModPodge for ceramic items!
And if you’re really a crazy person like me who LOVES to decoupage a LOT you can even get a whole 128 oz gallon size jug of Mod Podge!
Liquitex Matte Medium:
Aleene's Duncan 8-Ounce Medium Collage Pauge Instant Decoupage, Matte
Mod Podge CS11303 Waterbase Sealer, Glue and Finish, 32 oz, Matte & Gloss Waterbase Sealer, Glue (16-Ounce), CS11202 Finish, 16 oz


FolkArt 16 Piece Multi Surface Acrylic Craft Paint Set Formulated to be Non-Toxic that is Perfect for Beginners and Artists, Bright Colors Count

Krylon K01303007 Acrylic Spray Paint Crystal Clear in 11-Ounce Aerosol
I personally really like to use Liquitex matte gel medium for my decoupage projects where quality counts, such as making gifts for friends or items I want to sell.
I don’t always use it because out of the three options listed here it is the most expensive – but I love to use it. It is also available in gloss finishes.
All of these three types of decoupage mediums are great choices, and again, it is going to depend on your own personal preference and desired outcome.
If this is your first time decoupaging, start with what is easily available to you and give it a try! You can always advance to trying different types of glues and adhesives as you get in more practice!
What About Decoupage on Metal or Glass Objects?
In most cases, you do not need any special glues other than what you would already be using for decoupage to attach to metal or glass objects.
It can be helpful however to make sure you prep the surface area. Be sure that the item is clean and free from any dust. For metal, you may wish to lightly sand the surface, as this will give it some “grit” for the papers to attach to.
Another popular option is to prime the metal or glass object with an enamel based paint. It is much easier to paint bottles, metal furniture and more when you use the right type of paint.
Folk Art Multi Surface paint is the paint I use and recommend for metal and glass surfaces. It really does make a big difference!
FolkArt 16 Piece Multi Surface Acrylic Craft Paint Set Formulated to be Non-Toxic that is Perfect for Beginners and Artists, Bright Colors Count
When you paint a metal, glass or plastic object first, this gives the paper and glue a much better hold to the item, as the acrylic paint is easier to stick to.
Other Supplies and Tools You Will Need for Decoupage:
In addition to an item to decoupage, images and glue, you will need a paint brush. I recommend using foam brushes, as these do not leave brush strokes like a regular paint brush does.
Of course, adding a brush stroke texture is perfectly okay if you want your items to have a “painted on” look or if it is part of the overall design you have in mind.
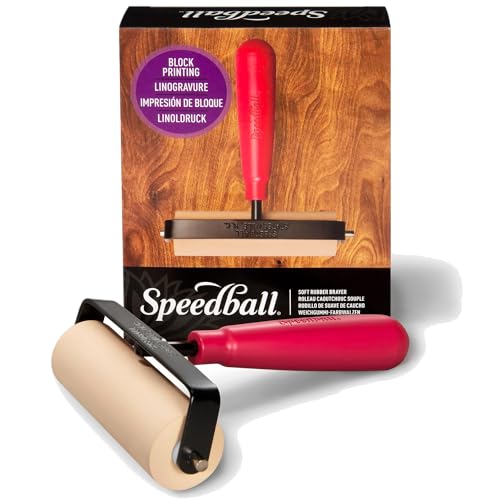
You may also wish to keep some popsicle sticks on hand, or to invest in a decoupage brayer. These can help smooth out any bubbles or wrinkles in the paper.
Now that we’ve gone over the basic supplies that you need, let’s get started! Learning how to decoupage is fun and easy! As you gain experience and practice you will soon be making all sorts of fabulous creations!
How to Decoupage Step by Step
Now that we’ve gone over the basic supplies and materials, the first step is to prepare your workspace and gather everything you will need. Once you have all the supplies gathered and your workspace cleared to go, you are ready to get started!
Step 1: Paint if Desired
If you are planning to decoupage on top of a painted surface, the first step is to paint the object first. Be sure to let the paint completely dry before applying images. If you do not allow for the paint to dry, it may smear everywhere. This can be a neat effect for some projects, but it’s not always predictable or what you really want to do!
Step 2: Add Image

Brush on a light coat of glue on the image and put on top of the surface. Be sure to smooth out any wrinkles and bubbles for the best results.
Brush on a top layer of glue over your image. Be careful to apply it as evenly as possible. Use a brayer or popsicle stick to lightly smooth out any bubbles, wrinkles, or air pockets.
Step 3: Repeat Brushing on Glue 3 or More Times
Once your first layer of decoupage glue is complete, you will likely want to brush on several more layers of glue over the entire surface 3-4 more times, until you have the desired finish. This will help protect the image and make it more likely to last a very long time!
Step 4: Once Glue is Cured, Spray With Varnish {Optional}
Krylon K01303007 Acrylic Spray Paint Crystal Clear in 11-Ounce Aerosol
Most decoupage glues tout themselves as 2-in-1 glue and sealant. However, in my experience, it is best to apply a final coat of varnish for the best lasting effects. The other advantage to this is if you used a matte finish and decide you wanted it glossy, you can add some shine using a gloss varnish.
If using Mod Podge as a decoupage glue, they recommend that you allow an item to “cure” for at least 4 weeks before applying a varnish.
I’ve worked with a lot of different types of varnish both in artwork and in refinishing furniture. After years of experimentation, my go-to for everything is Kyrlon Crystal Clear. It’s easy to use and gives your work a final protective coat that it will make it very easy to clean in future years.
Shop My Recommended Decoupage Supplies
For your convenience, here is a grid of all of my favorite decoupage supplies you can get inexpensively online. While most craft stores also sell these things, I’ve found online usually has the best pricing.
I hope you find this basic guide on how to decoupage helpful. The hardest part of course is becoming familiar with the different supplies and glues. Once you have a working knowledge of how the adhesives work, you are ready to start decoupaging all sorts of things!
Have questions about getting started with decoupage? Do you have any tips for decoupage that you would like to share? Comments are always welcomed below!
Thank you
Is the layering of several similar cutout pictures placed slightly apart on top of each other, a form of decoupage?
Yes:). I did this on my walls as a teen in the 70’s.
I need info please……If I use a napkin with a white background on a navy jar, how will the white from the napkin disappear?
Very helpful but I am still unclear about initial step – once picture is glued to surface do you immediately brush over with glue or wait for the picture to dry first? When I have glued on top when wet it has caused picture to wrinkle terrribly, though it was flat before. Any answers to this please?
Hi Mary, you’ll want to add the glue on while it is still wet. If the picture is wrinkling, you may want to try using less glue – if you water down the glue a bit and go with a very light coat that can help minimize the wrinkles.
A tree fell over in my Dad’s yard and he brought some of the medium size branches into his woodshop. Can I decoupage on thin slices of these tree branches? Can the wood be raw, untreated wood? Many thanks…Donna
Hi Donna, I would think it’s fine to decoupage. I’d probably do a couple of layers of glue or primer on top of the wood before decoupaging just so that if the wood were to dry out and crack later it wouldn’t disrupt the design/artwork too much. Hope that helps!